Pages

Sunday, September 29, 2013

Wanna Be Kind Bars!

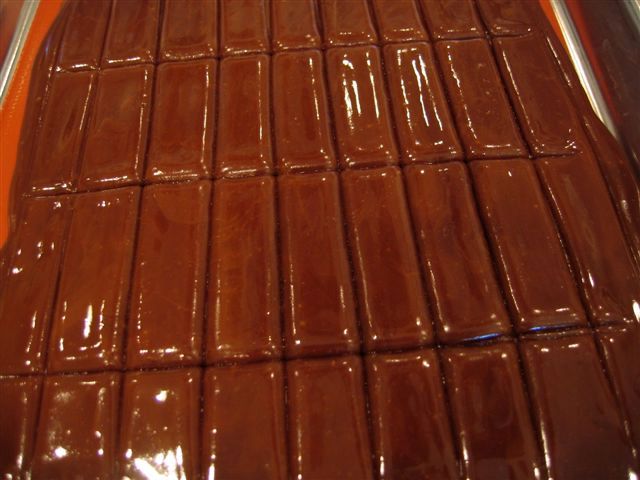
My sister-in-law sent me a text yesterday and said "you're gonna freak out, look what I found!" and boy was she right! We are granola bar freaks and this is right up our alley. Monica Matheny has this website where she shows all the work she has done to create the copycat Kind Bars. She has 8 different varieties and I have made all but 2 so far. They are all fabulous, so far my favorite is the Almond Coconut with the Peanut Butter Dark Chocolate coming in a close 2nd! Could have been my measuring, but I found the Apricot Almond and the Blueberry Pecan to be a little too sticky for my liking so next time I will measure a little heavier on the nuts. Like I said, could have been my initial measuring as these were the first two I made right out of the gate. She has done a superb job with her renditions and I urge you to visit her site and try these bad boys! Way to go Monica!


I wrap these in my trusty confectionery twisting wax paper that measures 4-1/2" x 5-1/2"and they fit perfectly! Then I wrap again in cellophane and pop them in the freezer. These freeze exceptionally well and I just pull them out the night before and throw them in our lunches the next day. Instant treat! How fun is that!

Recipes from The Yummy Life.


Saturday, August 3, 2013

Bridal Shower Rose Cake


My niece is getting married in early October and asked me if I would make her a cake for her Bridal Shower. I was so flattered that I jumped at the chance before I realized I was so far from being a professional baker and I panicked! It took me weeks of planning because when it comes right down to it...what kind of cake are you going to make? I wanted it to be perfect for her. Well, let me tell you it's just not that easy to decide!

Cakes can be presented in many forms, from simple sheet cake to elaborate decorated works of art. The types of cakes, filling, and frosting are all things I needed to contemplate. After weekends of trials trying to create something outside my scope, I decided simplicity was best.  I wanted simple sophistication with a little vintage flair. I needed a white cake that would carry a fresh raspberries and whipped cream layered filling. My ole standby coconut cake is one of the best cakes as far as structure and texture that will carry almost any type of filling and frosting you could throw at it. I just replaced the coconut extract with raspberry extract. I filled it with fresh whipped cream and raspberry layers and frosted it with the most wonderful Italian meringue buttercream with vanilla extract that gave it the most beautiful off white color you have ever seen. I mix my buttercream with whipped cream in a 3:1 ratio to give it a lighter taste and texture. Now mind you when it came to the decorating that was actually the easy part....You-Tube! Did you know you can learn to do anything on You-Tube? How fun is that!


Mr. Brown's Italian Meringue Buttercream Recipe

 Yield 1 cake

Ingredients

1 cup sugar
1/4 cup water

5 egg whites
1/4 cup sugar
2 cups unsalted butter, room temperature, cut into tablespoons

Instructions

Boil 1 cup sugar and 1/4 cup water over medium heat until it reaches 245. As it cooks begin meringue so it's ready when syrup is done.
Whip egg whites with a wire whisk in a stand up mixer on high until soft peaks form. About 1-2 minutes. Sprinkle in 1/4 cup sugar. Beat.
Slowly pour the hot syrup into the meringue steadily with the mixer still on high.
Beat the frosting for 7-10 minutes until the outside of the bowl is room temperature.
Beat in butter by the tablespoon. The butter will deflate the frosting a bit.
Add in desired flavorings.

Flavorings:
Chocolate: 1/2 cup melted and cooled chocolate and 1 teaspoon vanilla extract.
Coconut: 1 teaspoon coconut extract and 1 teaspoon vanilla extract.
Coffee: 1 teaspoon espresso powder or 3-5 tablespoons strong coffee.

Kim's Notes: I add in fresh whipped cream at the end after any desired flavorings have been added in. Usually a ratio of 3:1 so that I can maintain enough structure to do delicate pipework.

 Recipe From Mr. Brown on Food.com 
 Cakelove video of Mr. Brown - Great watch!


Monday, June 17, 2013

Fruit Pizza

So my sister-in-law made these fabulous fruit pizza's for my niece's graduation.  I fell in love with this and got the recipe and made it for Father's Day. It is so remarkably simple and so flippin' good!

I am sure she was as embarrassed to tell me as I will be to pass this on, but the recipe is actually from the Pillsbury website using their refrigerated cookie dough. In no way do I condemn shortcuts what-so-ever, but I will tell you that I cannot bring myself to buy dough of any form...well, I have been know to buy pizza dough from Trader Joe's, but only after making my own several times and realizing you couldn't taste the extra effort I put into homemade, so I caved.

 But other than that, o yeah, there was this time when I was caught short and needed to made a quick pie and got the pie dough from Trader Joe's...another secret. I really do prefer to make my own, it's very simple and doesn't take too much time, but in a pinch, Trader Joe's shines! I would put it up against a homemade crust in a contest...but with that said, I really can't do the Pillsbury thing

I used my sugar cookie recipe from Sherry Yard's  "The Secrets of Baking" cookbook. Rolled the dough out and baked it on my pizza pan. Let it cool and then spread that yummy sauce all over the cooled cookie and make your fruit masterpiece. The fun is cutting it into wedge like pizza slices and serve it next to a scoop of vanilla ice-cream if you really want to go for it! I highly recommend!


The main thing you really need to know is the pizza "sauce" consisting of cream cheese, sugar, and vanilla. Who can resist that! I also don't use the apple jelly to glaze the fruit, just seems too  sweet and goopy and unnecessary to me, I prefer the freshness. However, depending on your circumstances, if you thought your fruit would dry out, I suppose a little brush stroke of jelly wouldn't hurt.

These are also really really cute little party finger foods when done on individually baked little sugar cookies. Just chop up the fruit into smaller pieces. You could even let the guests make their own. How fun is that!


Master Sugar Cookies Recipe

Yield abt 3 doz 3-inch round cookies

 Ingredients

6 ounces (1-1/2 sticks) cold unsalted butter, cut into 1/2" pieces
1/2 cup plus 1 Tbs sugar, plus 1/4 cup for rolling
1/4 tsp salt
1 tsp vanilla extract
1 large egg, at room temperature
1-3/4 cups all-purpose flour, sifted

Instructions

Using a standing mixer fitted with a paddle attachment or a hand mixer, cream the butter on medium speed until pale yellow, about 2 minutes. Scrape down the sides of the bowl and the paddle or beaters. Add the sugar, salt, and vanilla. Cream on medium speed until it is smooth, about 1 minute. Stop the mixer and scrape down the sides of the bowl and the paddle.

Add the egg and beat on low speed for 15 seconds, or until fully incorporated. Do not overbeat. Scrape down the sides of the bowl and the paddle.

On low speed, add the flour. Beat until all of the flour is incorporated. Scrape down the sides of the bowl, then mix on low speed for 15 to 30 seconds, or until you have an even-textured dough.


Remove small handfuls of dough from the mixer and plop them down the middle of a sheet of parchment paper, creating a log about 1-1/2 inches wide and 12 inches long. Fold the parchment over creating a sausage. Chill for at least 1 hour. At this point, the dough will keep nicely, tightly wrapped, in the refrigerator for up to 1 week or in the freezer for up to 1 month. (Thaw frozen dough at room temperature for about 30 minutes, or until you can slice it.)

Preheat the oven to 350. Adjust the rack to the lower third of the oven. Line two baking sheets with parchment paper.

When the dough has chilled, remove it from the parchment, pour the remaining 1/4 cup sugar onto your work surface, and roll the log in the sugar. Using a chef's knife, slice 1/3 inch thick rounds off the log. Place the cookies 1 inch apart on the prepared baking sheets. Alternate the rows, checkerboard fashion.

Bake one sheet at a time for 12 to 15 minutes, or until golden brown around the edges, turning the baking sheet front to back halfway through the baking. Remove from the oven and carefully slide the parchment onto a work surface. Wait at least 5 minutes before serving or 20 minutes before storing in an airtight container for up to 3 days at room temperature. The cookies can also be frozen for up to 1 month.

* Note: Baking at a lower temperature (325) for a longer period of time results in a crisp cookie. Baking at a higher temperature (350) for a shorter time creates a softer, chewier center.


Kim's Notes: If using this recipe for the fruit pizza, I roll it out on parchment as quickly as possible for the pizza, then chill. I bake at the 350 degree temp creating the softer crust for about 15-18 minutes, or until golden brown around the edges.

 Recipe from The Secrets of Baking by Sherry Yard


Pillsbury

Wednesday, May 29, 2013

See's Candy Molasses Chip Rival and Toffee Suckers....A two-fer!

See's Candy molasses chips have always been one of my all time favorites. Yum! The Easter Bunny always brought us kids a box of molasses chips every year as far back as I can remember.  It's still quite a tradition in our family and has been passed down a generation. My children still get them whether they want them or not! Thank goodness Mary See's legacy hasn't changed in all these years. Thank those Canadians for having such a wonderful candy maker born in their beautiful country and allowed her to cross the border to be shared with the rest of us. ♥ Who knows what the Easter Bunny might have brought me had Mary not come to Califonia!

Enrobed in 63% Couverture Chocolate


Well, I loved them so much I worked on trying to find a recipe that could match them. It took quite a few years but I found it. It's not the original recipe of course, but it's such a rival and half of my sisters like them better! Shhhh...Mary must never know.

I used the same recipe in these wonderful toffee suckers.

You will not be surprised to find the recipe is from none other than Zoe Francois.

She is such an inspiration to me. I so wish I could go to pastry school just to see and learn how to use all their cool toys! How fun is that!


Chocolate Covered Toffee by Zoe Francois


Sunday, May 12, 2013

It's Mother's Day.....Laugh!

I don't know how this cannot just make your Mother's Day. How cute is that!


Friday, April 26, 2013

Sambazon Açai Café

Açai Bowl with Pumpkin Flax Granola and Coconut ♥
Wow are these little bowls delish! So I was down visiting my daughter and my new son-in-law (sounds so weird for me to say that still!) and she took me to this cute little smoothie shop in town called Sambazon that has these fantastic Açai bowls. They have this great menu of bowls and smoothies with more combinations that you could dream of. So now I'm hooked......

The best part is they sell their unsweetened organic puree in frozen packs so you can buy them and make your own. They offer so many recipes on their website. How fun is that!


Saturday, August 18, 2012

My Daughter Got Married!

How lucky am I to have two beautiful girls. The older one is the bride, the younger is the maid of honor. My son is the oldest of our three children and I couldn't be more proud of my family.

So my oldest daughter has been volunteering our chocolate making skills for a few of her friends for various occasions over the last few years. It has been fun and pushed our skill level that now includes using transfer sheets as well as various shapes with the help of ganache cutters. So when the time came for her wedding she really wanted her favors done with chocolate. Hummmm, isn't there enough stress on the mother of the bride?

We looked at various box sizes and shapes, tried to determine the type of truffle we wanted. Did we want a beautiful heart shape honey ganache paired with a salted caramel using a pink Himalayan sea salt? Did we want to have transfer sheets made with some personal detail? Decisions decisions. How would the weather of a summer wedding affect the process, how would I transport them, did I really want to spend the weekend before the wedding making fresh truffles considering the short shelf life? She lives in Southern California and I live in Northern California....how are we going to overcome that issue...o the pressure was building!

Beach Wedding! We brainstormed and decided to pour solids in various beach themed molds. We had some great little seashells as fillers and the main event were starfish, surfboards, and flipflops all boxed up and tied with a little rustic cord. Worries of weather,  timing, and transporting were over. I could make them a few weeks ahead of time and get them all boxed up and bring them down with me. The pressure was gone....I was on to enjoying the more important things that come with having your first child marry ♥
How fun is that!