Pages

Monday, January 6, 2014

Jam Crostata

Who gets up at 4:30 on a Sunday morning to bake a crostata and read a book anyway? Silly me.

I just read the most amazing story of patriotism, courage, drive, adversity and probably 10 other descriptive words that escape me at the moment. I know the book has been out for a while, but I don't seem to ever get around to reading them until someone decides they are going to make a movie, then I gotta read and research it thoroughly to see what Hollywood embellishes once they take it from the pages to the big screen. Nothing worse than a true story made fiction by Hollywood in my opinion so I hope they do these men and the surviving members of the families of these men justice. It's called the Lone Survivor by Marcus Luttrell.

I love this recipe by Giada De Laurentiis. This is from her cookbook "Giada's Family Dinners" and the recipe is actually titled Plum Crostata, but I use whatever jam I have on the shelf from canning season. This is Peach. Give it a go, both the Crostata AND the book.

 It's truly a day worth spent!  How fun is that!

Jam Crostata

Ingredients

1-1/2 cups flour
2 Tbs sugar
Grated zest of 1 lemon
1/4 tsp salt
10 Tbs (1-1/4 sticks) unsalted butter, chilled and cut into 1/2" pieces
3-4 Tbs ice water
3/4 cup preserves
1 Tbs toasted sliced almonds (optional)
Confectioners' sugar for dusting (optional)

Instructions

Combine the flour, sugar, lemon zest, and salt in a food processor and whir to blend. Add the butter and pulse until the mixture resembles a coarse meal. Add the ice water bit by bit, pulsing until moist clumps form. Gather the dough into a ball; flatten it into a disk. Wrap the dough in plastic and refrigerate until firm, about 1 hour.

Position the rack in the center of the oven and preheat the oven to 400 degrees. Roll out the dough on a large sheet of parchment paper to an 11 inch round. Transfer dough on the parchment paper to a large, heavy baking sheet. Spread the preserves over the dough, leaving a 2-inch border. Fold the dough border over the filling to form an 8-inch round, pleating the crust loosely and pinching to seal any cracks in the dough.

Bake the crostata until the crust is golden, about 40 minutes. Put the baking sheet on a rack to cool for 10 minutes, then slide a metal spatula under the crust to free the crostata from the parchment so it doesn't stick while cooling. Cool to lukewarm. Sprinkle with the almonds and dust with the confectioners' sugar if using. Transfer the crostata to a platter and serve.

Recipe from Giada's Family Dinners Cookbook

Monday, December 30, 2013

Baby Taylor's Cake

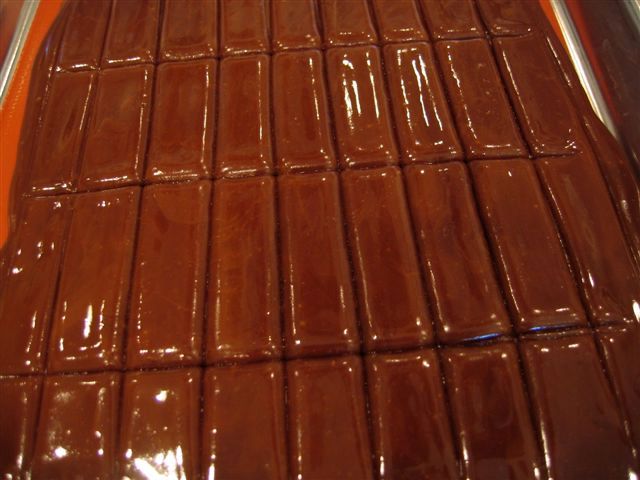
Think you are seeing double? Nope! It's true, I am having another grandchild that is due just 5 weeks after Baby B! This one is a girl and we just had her shower this past weekend. Considering she is the first girl grandchild she is already known as the "princess" and had special chocolate crowns made just for her occasion!

This cake was done in the Devil's Food recipe from none other than Zoe Francois. I only used half a recipe for a small cake and had plenty to do a tray of mini cupcakes too. The frosting is also my favorite Mr. Brown's Italian Meringue Buttercream.


These cute little suckers were just poured in solids using my coverture chocolate that I tempered, the
good stuff!   How fun is that!


Devil's Food Cake Recipe

Yield 3 doz cupcakes

Ingredients

3 cups granulated sugar
2 3/4 cups all-purpose flour
1 1/8 cups cocoa powder (It doesn’t seem to make a difference if you use natural or Dutch-processed), sift if lumpy.
1 1/4 teaspoons baking powder
2 1/4 teaspoons baking soda
1 1/2 teaspoons salt
3 large eggs
1 1/2 cups milk or buttermilk
3/4 cup vegetable oil
2 teaspoons vanilla extract
1 1/4 cup hot coffee
1/4 cup rum or brandy (if you opt out of the booze then use equal parts coffee)


Instructions

Heat the oven to 350 degrees and prepare 3 dozen muffin tins with papers
Combine all the dry ingredients together in a large bowl and whisk until combined, set aside.

Whisk together, eggs, milk, oil and vanilla until well combined. Add the egg mixture to the dry ingredients and whisk until smooth. Slowly add the hot coffee and rum to the batter and whisk until totally blended and smooth, about 2 minutes. The batter will be quite runny.

Fill a measuring cup or pitcher with the batter and then fill the muffin cups about 3/4 full. (Warning: some people have reported back that their cupcakes overflow when they fill them this full. You may want to try the first batch 2/3 full!)

Bake the cupcakes for about 18-20 minutes or until a tester comes out clean.
Allow to cool on a cake rack and then frost.


Updated: Sweet Baby Taylor was born February 15! How fun is that!


Recipe from Zoe Francois

Sunday, December 1, 2013

Baby B's Cake


So..... I'm going to be a Grammie!

Quite an exciting year for me...Yes, it's true. My daughter is having my first grandchild, a little boy, sometime around January 5. We just recently had a beautiful baby shower just to get a glimpse of how spoiled he will be.

I made my usual coconut cake which I fondly refer to as my "wedding" cake because adding flavors to it is so simple! This was a whipped cream and blackberry filling with my usual Italian Meringue Buttercream frosting. The ribbon decoration was done with a rose leaf pastry tip.  One of my wonderful sisters made these cute little cake pops that were absolutely fabulous! We didn't even collaborate and our colors were almost perfect!

I made these adorable little mustache suckers that were just poured in solid chocolate for the favors.


I can't believe I'm going to be a Grammie! How fun is that!


Coconut Cake and Italian Meringue Buttercream recipes found here.


Updated: Little Baby B was born on Christmas Eve! How fun is that!

Saturday, November 23, 2013

French Toast Muffins


Aren't these the cutest little things! I am hosting a baby shower for my daughter next weekend and am trying out the menu. We are doing a brunch and she wanted one of those french toast casseroles to be included. I tried several recipes but they were just terrible, not to mention I wanted something visually appealing and lets face it, casseroles just aren't beautiful! They are more comfy and cozy, I wanted festive and adorable! I found this great blog hosted by Maria called Two Peas and Their Pod. She is a genius! These took a little bit of work like she mentioned, but so worth it! The best part was I could make and bake them the day before and then I just popped them in the oven to warm right before the party! We served them with homemade pomegranate syrup and they were a huge hit... How fun is that!


Baked French Toast Muffin Recipe

Yield 12 muffins

Ingredients

1 loaf French bread, cut or torn into 1/2 inch cubes (about 12 cups of bread)
2-1/2 cups milk
6 large eggs
1/2 cup granulated sugar
1 Tablespoon vanilla extract
1 teaspoon ground cinnamon


For the Cinnamon Streusel Topping:

1/4 cup cold butter
1/4 cup light brown sugar
1/4 cup all-purpose flour
1/8 teaspoon ground cinnamon
pinch of salt

Butter and maple syrup for serving, optional

Instructions

In a medium bowl, whisk together the milk, eggs, sugar, vanilla, and cinnamon.

Grease a 12 cup muffin tin. Add about 1 cup of bread cubes to each muffin cup. Carefully pour egg and milk mixture evenly over each muffin tin. You may need to press down on the bread cubes after you pour a little mixture and then pour more. Pour slowly or you will have a mess. Cover the muffins with plastic wrap and refrigerate for 2 hours or up to overnight.

When ready to bake, preheat the oven to 350 degrees F. To make the cinnamon streusel, in a small bowl, combine butter, brown sugar, flour, cinnamon, and salt. Mix together with your hands, until you have a crumbly mixture. Remove the muffins from the refrigerator and sprinkle the muffins evenly with the streusel topping.

Bake for 25 minutes or until tops are golden brown. Let muffins cool for 5 minutes. Remove from pan and serve with butter and maple syrup, if desired.

Kim's Notes: I actually doubled recipe and was able to get 3 dozen muffins. This makes a little more egg mixture than you need for 1 dozen, but I ended up using the leftovers to make traditional french toast while these were soaking!

 Recipe from Two Peas and Their Pod.


Sunday, September 29, 2013

Wanna Be Kind Bars!

My sister-in-law sent me a text yesterday and said "you're gonna freak out, look what I found!" and boy was she right! We are granola bar freaks and this is right up our alley. Monica Matheny has this website where she shows all the work she has done to create the copycat Kind Bars. She has 8 different varieties and I have made all but 2 so far. They are all fabulous, so far my favorite is the Almond Coconut with the Peanut Butter Dark Chocolate coming in a close 2nd! Could have been my measuring, but I found the Apricot Almond and the Blueberry Pecan to be a little too sticky for my liking so next time I will measure a little heavier on the nuts. Like I said, could have been my initial measuring as these were the first two I made right out of the gate. She has done a superb job with her renditions and I urge you to visit her site and try these bad boys! Way to go Monica!


I wrap these in my trusty confectionery twisting wax paper that measures 4-1/2" x 5-1/2"and they fit perfectly! Then I wrap again in cellophane and pop them in the freezer. These freeze exceptionally well and I just pull them out the night before and throw them in our lunches the next day. Instant treat! How fun is that!

Recipes from The Yummy Life.


Saturday, August 3, 2013

Bridal Shower Rose Cake


My niece is getting married in early October and asked me if I would make her a cake for her Bridal Shower. I was so flattered that I jumped at the chance before I realized I was so far from being a professional baker and I panicked! It took me weeks of planning because when it comes right down to it...what kind of cake are you going to make? I wanted it to be perfect for her. Well, let me tell you it's just not that easy to decide!

Cakes can be presented in many forms, from simple sheet cake to elaborate decorated works of art. The types of cakes, filling, and frosting are all things I needed to contemplate. After weekends of trials trying to create something outside my scope, I decided simplicity was best.  I wanted simple sophistication with a little vintage flair. I needed a white cake that would carry a fresh raspberries and whipped cream layered filling. My ole standby coconut cake is one of the best cakes as far as structure and texture that will carry almost any type of filling and frosting you could throw at it. I just replaced the coconut extract with raspberry extract. I filled it with fresh whipped cream and raspberry layers and frosted it with the most wonderful Italian meringue buttercream with vanilla extract that gave it the most beautiful off white color you have ever seen. I mix my buttercream with whipped cream in a 3:1 ratio to give it a lighter taste and texture. Now mind you when it came to the decorating that was actually the easy part....You-Tube! Did you know you can learn to do anything on You-Tube? How fun is that!


Mr. Brown's Italian Meringue Buttercream Recipe

 Yield 1 cake

Ingredients

1 cup sugar
1/4 cup water

5 egg whites
1/4 cup sugar
2 cups unsalted butter, room temperature, cut into tablespoons

Instructions

Boil 1 cup sugar and 1/4 cup water over medium heat until it reaches 245. As it cooks begin meringue so it's ready when syrup is done.
Whip egg whites with a wire whisk in a stand up mixer on high until soft peaks form. About 1-2 minutes. Sprinkle in 1/4 cup sugar. Beat.
Slowly pour the hot syrup into the meringue steadily with the mixer still on high.
Beat the frosting for 7-10 minutes until the outside of the bowl is room temperature.
Beat in butter by the tablespoon. The butter will deflate the frosting a bit.
Add in desired flavorings.

Flavorings:
Chocolate: 1/2 cup melted and cooled chocolate and 1 teaspoon vanilla extract.
Coconut: 1 teaspoon coconut extract and 1 teaspoon vanilla extract.
Coffee: 1 teaspoon espresso powder or 3-5 tablespoons strong coffee.

Kim's Notes: I add in fresh whipped cream at the end after any desired flavorings have been added in. Usually a ratio of 3:1 so that I can maintain enough structure to do delicate pipework.

 Recipe From Mr. Brown on Food.com 
 Cakelove video of Mr. Brown - Great watch!


Monday, June 17, 2013

Fruit Pizza

So my sister-in-law made these fabulous fruit pizza's for my niece's graduation.  I fell in love with this and got the recipe and made it for Father's Day. It is so remarkably simple and so flippin' good!

I am sure she was as embarrassed to tell me as I will be to pass this on, but the recipe is actually from the Pillsbury website using their refrigerated cookie dough. In no way do I condemn shortcuts what-so-ever, but I will tell you that I cannot bring myself to buy dough of any form...well, I have been know to buy pizza dough from Trader Joe's, but only after making my own several times and realizing you couldn't taste the extra effort I put into homemade, so I caved.

 But other than that, o yeah, there was this time when I was caught short and needed to made a quick pie and got the pie dough from Trader Joe's...another secret. I really do prefer to make my own, it's very simple and doesn't take too much time, but in a pinch, Trader Joe's shines! I would put it up against a homemade crust in a contest...but with that said, I really can't do the Pillsbury thing

I used my sugar cookie recipe from Sherry Yard's  "The Secrets of Baking" cookbook. Rolled the dough out and baked it on my pizza pan. Let it cool and then spread that yummy sauce all over the cooled cookie and make your fruit masterpiece. The fun is cutting it into wedge like pizza slices and serve it next to a scoop of vanilla ice-cream if you really want to go for it! I highly recommend!


The main thing you really need to know is the pizza "sauce" consisting of cream cheese, sugar, and vanilla. Who can resist that! I also don't use the apple jelly to glaze the fruit, just seems too  sweet and goopy and unnecessary to me, I prefer the freshness. However, depending on your circumstances, if you thought your fruit would dry out, I suppose a little brush stroke of jelly wouldn't hurt.

These are also really really cute little party finger foods when done on individually baked little sugar cookies. Just chop up the fruit into smaller pieces. You could even let the guests make their own. How fun is that!


Master Sugar Cookies Recipe

Yield abt 3 doz 3-inch round cookies

 Ingredients

6 ounces (1-1/2 sticks) cold unsalted butter, cut into 1/2" pieces
1/2 cup plus 1 Tbs sugar, plus 1/4 cup for rolling
1/4 tsp salt
1 tsp vanilla extract
1 large egg, at room temperature
1-3/4 cups all-purpose flour, sifted

Instructions

Using a standing mixer fitted with a paddle attachment or a hand mixer, cream the butter on medium speed until pale yellow, about 2 minutes. Scrape down the sides of the bowl and the paddle or beaters. Add the sugar, salt, and vanilla. Cream on medium speed until it is smooth, about 1 minute. Stop the mixer and scrape down the sides of the bowl and the paddle.

Add the egg and beat on low speed for 15 seconds, or until fully incorporated. Do not overbeat. Scrape down the sides of the bowl and the paddle.

On low speed, add the flour. Beat until all of the flour is incorporated. Scrape down the sides of the bowl, then mix on low speed for 15 to 30 seconds, or until you have an even-textured dough.


Remove small handfuls of dough from the mixer and plop them down the middle of a sheet of parchment paper, creating a log about 1-1/2 inches wide and 12 inches long. Fold the parchment over creating a sausage. Chill for at least 1 hour. At this point, the dough will keep nicely, tightly wrapped, in the refrigerator for up to 1 week or in the freezer for up to 1 month. (Thaw frozen dough at room temperature for about 30 minutes, or until you can slice it.)

Preheat the oven to 350. Adjust the rack to the lower third of the oven. Line two baking sheets with parchment paper.

When the dough has chilled, remove it from the parchment, pour the remaining 1/4 cup sugar onto your work surface, and roll the log in the sugar. Using a chef's knife, slice 1/3 inch thick rounds off the log. Place the cookies 1 inch apart on the prepared baking sheets. Alternate the rows, checkerboard fashion.

Bake one sheet at a time for 12 to 15 minutes, or until golden brown around the edges, turning the baking sheet front to back halfway through the baking. Remove from the oven and carefully slide the parchment onto a work surface. Wait at least 5 minutes before serving or 20 minutes before storing in an airtight container for up to 3 days at room temperature. The cookies can also be frozen for up to 1 month.

* Note: Baking at a lower temperature (325) for a longer period of time results in a crisp cookie. Baking at a higher temperature (350) for a shorter time creates a softer, chewier center.


Kim's Notes: If using this recipe for the fruit pizza, I roll it out on parchment as quickly as possible for the pizza, then chill. I bake at the 350 degree temp creating the softer crust for about 15-18 minutes, or until golden brown around the edges.

 Recipe from The Secrets of Baking by Sherry Yard


Pillsbury

Wednesday, May 29, 2013

See's Candy Molasses Chip Rival and Toffee Suckers....A two-fer!

See's Candy molasses chips have always been one of my all time favorites. Yum! The Easter Bunny always brought us kids a box of molasses chips every year as far back as I can remember.  It's still quite a tradition in our family and has been passed down a generation. My children still get them whether they want them or not! Thank goodness Mary See's legacy hasn't changed in all these years. Thank those Canadians for having such a wonderful candy maker born in their beautiful country and allowed her to cross the border to be shared with the rest of us. ♥ Who knows what the Easter Bunny might have brought me had Mary not come to Califonia!

Enrobed in 63% Couverture Chocolate


Well, I loved them so much I worked on trying to find a recipe that could match them. It took quite a few years but I found it. It's not the original recipe of course, but it's such a rival and half of my sisters like them better! Shhhh...Mary must never know.

I used the same recipe in these wonderful toffee suckers.

You will not be surprised to find the recipe is from none other than Zoe Francois.

She is such an inspiration to me. I so wish I could go to pastry school just to see and learn how to use all their cool toys! How fun is that!


Chocolate Covered Toffee by Zoe Francois


Sunday, May 12, 2013

It's Mother's Day.....Laugh!

I don't know how this cannot just make your Mother's Day. How cute is that!


Friday, April 26, 2013

Sambazon Açai Café

Açai Bowl with Pumpkin Flax Granola and Coconut ♥
Wow are these little bowls delish! So I was down visiting my daughter and my new son-in-law (sounds so weird for me to say that still!) and she took me to this cute little smoothie shop in town called Sambazon that has these fantastic Açai bowls. They have this great menu of bowls and smoothies with more combinations that you could dream of. So now I'm hooked......

The best part is they sell their unsweetened organic puree in frozen packs so you can buy them and make your own. They offer so many recipes on their website. How fun is that!


Saturday, August 18, 2012

My Daughter Got Married!

How lucky am I to have two beautiful girls. The older one is the bride, the younger is the maid of honor. My son is the oldest of our three children and I couldn't be more proud of my family.

So my oldest daughter has been volunteering our chocolate making skills for a few of her friends for various occasions over the last few years. It has been fun and pushed our skill level that now includes using transfer sheets as well as various shapes with the help of ganache cutters. So when the time came for her wedding she really wanted her favors done with chocolate. Hummmm, isn't there enough stress on the mother of the bride?

We looked at various box sizes and shapes, tried to determine the type of truffle we wanted. Did we want a beautiful heart shape honey ganache paired with a salted caramel using a pink Himalayan sea salt? Did we want to have transfer sheets made with some personal detail? Decisions decisions. How would the weather of a summer wedding affect the process, how would I transport them, did I really want to spend the weekend before the wedding making fresh truffles considering the short shelf life? She lives in Southern California and I live in Northern California....how are we going to overcome that issue...o the pressure was building!

Beach Wedding! We brainstormed and decided to pour solids in various beach themed molds. We had some great little seashells as fillers and the main event were starfish, surfboards, and flipflops all boxed up and tied with a little rustic cord. Worries of weather,  timing, and transporting were over. I could make them a few weeks ahead of time and get them all boxed up and bring them down with me. The pressure was gone....I was on to enjoying the more important things that come with having your first child marry ♥
How fun is that!

Sunday, March 4, 2012

Sweet Milk Scones

This is NOT for the people who like donuts sopping with maple glaze that is so cloyingly sweet you feel like you need a trip to the dentist after the first bite! There are more of a biscuit type scone even though the title suggests they are sweet. They are very tender and light compared with the rock hard dry scones I have tried in the past, no wonder I always disliked "scones".....

These are so simple to make they have become a staple in my house. I use whatever kind of dried fruit I have on hand. I keep a lot of assorted dried fruits and nuts in the freezer because I am always mixing up my own trail mix to bring to work. This is one of those recipes that I never have to plan ahead to make because the ingredients are so simple and always on hand.

The directions make it sound like they take more work than they do....after putting all the dry ingredients in the food processor and pulse to combine, I just throw in the butter; cubed, along with the dried fruit and put the lid back on. I turn it on while pouring the milk down the feed tube simultaneously so that I do not over mix the butter or chop the fruit into a million little pieces. This literally is a 10 second process for the dough to come together...makes it impossible to over-mix your dough! I then dump it out on a lightly floured surface and form a small disc with my hands that is probably about 6-8" across and about 3/4" deep.

I just cut my cute little scone dough pie into 8 scones with my pizza cutter...works like a charm, how fun is that!

Sweet-Milk Scone Recipe

Makes 8-9 scones

Work the dough quickly, don't overmix, and put the dough rounds into the heated oven as soon as possible. The process--from mixing to pulling the finished scones out of the oven--shouldn't take more than twenty minutes. Scones are best served warm and fresh, split open and topped with thick homemade strawberry or raspberry jam and clotted cream (or crème fraîche, marscarpone, or whipped cream). This recipe can be doubled.

Ingredients

  • 2 cups unbleached all-purpose flour
  • 1 teaspoon cream of tartar
  • 1/2 teaspoon baking soda
  • 1/2 teaspoon table salt
  • 1 - 2 tablespoons granulated sugar (optional)
  • 4 tablespoons unsalted butter , chilled and cut into 1/2-inch pieces
  • 1/2 cup raisins, currants, or small soft fruits such as raspberries
  • 3/4 cup whole milk

Instructions

  1. 1. Adjust oven rack to middle position and heat oven to 450 degrees.
  2. 2. Sift first 4 (or 5) ingredients into large bowl, or measure into workbowl of a food processor fitted with steel blade; pulse until blended. With pastry blender, 2 knives, or steel blade of a food processor, cut or process butter into flour mixture until mixture resembles coarse meal with a few slightly larger butter lumps.
  3. 3. If making by hand, (preferred method), make a well in the center of mixture and pour in milk. Working quickly, blend ingredients together with a rubber spatula into a soft, slightly wet dough. If using a food processor, pour milk through feed tube; pulse until dough just starts to gather into a rough ball (do not over process or scones will be tough). Turn dough onto a well-floured work surface.
  4. 4. Quickly roll dough to 1/2 inch thick. Use a lightly greased and floured 3-inch biscuit cutter to stamp dough with one decisive punch, cutting close together to generate as few scraps as possible. Dip cutter into flour as often as necessary to keep dough from sticking. Push scraps of dough together so that edges join; firmly pinch edges with fingertips to make a partial seal. Pat this remaining dough to 1/2 inch thick; continue to cut 3-inch rounds. Place dough rounds 1 1/2 inches apart on a greased baking sheet. Bake until scones are lightly brown, 10 to 12 minutes. Serve immediately.

    Recipe From Cook's Illustrated 
I

Tuesday, February 14, 2012

Gnocchi

There is nothing more comforting than mashed potatoes and gravy, except maybe gnocchi in a wonderful meat sauce! Every now and then I get this craving for soft pillowy home made gnocchi. It's kinda like pasta, once you have home made, there is no going back. The easiest trick for me is to use left over mashed potatoes. I make my mashed potatoes with unsalted butter and a combo of cream, half and half, milk, or chicken broth, and a little salt and pepper...it really depends on what's in the fridge at the time and what I have to use up, so it's never the same. The gnocchi turn out wonderful every time so it really doesn't matter. Now I have to say I do cheat, besides using left overs, I run down to Genova's, a wonderful little Italian deli, and grab a pint of their meat sauce. When you work full time, you gotta have shortcuts! Their meat sauce may be better than mine, but my gnocchi is better than theirs....so it's a wonderful combination in my book. How fun is that !


Gnocchi Recipe

Ingredients

2-3 cups prepared mashed potatoes


1/4-1/2 cup flour to begin with, may need up to 1 cup


1 egg yolk


salt & pepper to taste


1-2 cups meat sauce


fresh parmigiano reggiano cheese, grated for garnish


Instructions


If using left over mashed potatoes, heat in small pot or microwave until warm. If not, make some!
Transfer warmed mashed potatoes to a mixing bowl, add the yolk and mix. Add salt, pepper, and 1/2 cup of the flour. Knead together, I use a fork... and add more flour if necessary, bit by bit, kneading until a slightly sticky consistency is attained.
Lightly dust a work surface with flour. * Form the dough into sausage-like rolls about the thickness of your thumb. Cut into pieces about 1 inch in length. (See my note below, I leave my dough too tacky to be able to do it this way.) Using a fork, flatten the piece as you roll so that the tines leave an imprint in the gnocchi and roll it right off the end of the fork.  Keep a glass of water nearby to clean the fork.
Transfer to waxed paper lightly dusted with flour.
Heat meat sauce in serving platter in oven and keep warm.
Meanwhile, fill a 6 quart pot with salted water and bring to a boil. Reduce heat so the water is a gentle roll. Drop the gnocchi into water, about 12-16 at a time. They will sink to the bottom but will rise to the surface after a minute or three. Continue to cook for another 15 seconds.
Immediately remove with a slotted spoon to a colander. Sprinkle with a little olive oil to keep from sticking together, mix gently and transfer to heated meat sauce dish. Repeat until all gnocchi have been cooked.
Serve with parm on the side!

Kim's Note: * My trick for tender gnocchi is to stay as light on the flour as possible. When the dough is still fairly tacky, I scoop the potato mixture into little balls with a little #100 scoop and let sit for about 10 minutes on my baking sheet. They will develop a slight crust which you can then shape on fork. If you use too much flour your gnocchi will be too heavy, in both flavor and texture. It takes a little practice, but once you get the right consistency, you will be jumping for joy!

Friday, August 5, 2011

Peanut Honey Rolls

My mother should have been a food writer. She finds all these tasty little treats from days gone by. These are a simple mixture of peanut butter, honey, and dried powdered milk creamed together and then rolled in dry roasted, salted peanuts. I wrapped mine in individual waxed paper as you would salt water taffy and kept them in a container in the refrigerator for a quick treat. These don't even require any cooking, but should stay in the refrigerator to keep them firm. They remind me of a payday bar without the corn syrup, sugar, and vegetable oil additives.


She found this recipe in an old book called Honey I Love You - you're so sweet and good to me by the Reverend Maurice H. Ness. Copyright 1966.

These are delightful!....every time I eat one I think....should I enrobe these in chocolate ? ....to be continued :)


Peanut Honey Roll Recipe

Ingredients

1/2 cup peanut butter  
1/2 cup honey  
3/4 to 1 cup dry powdered milk 
1 cup dry roasted, salted peanuts, rough chopped

Instructions

Combine peanut butter, honey, and dry powdered milk with a beater until mixed. Use enough milk powder to get the consistency you like. You can either roll into a log at this point or use a small scooper and make little balls and flatten slightly. Roll or press into rough chopped peanuts and transfer to the refrigerator to chill. Wrap individually if desired.


Recipe by Rev. Maurice H. Ness

Tuesday, July 5, 2011

Corn and Poblano Lasagna

Marcella Valladolid, you have outdone yourself. She is the cute little chef on the Food Network that does the show Mexican Made Easy. I honestly don't watch it that often, but I do DVR episodes and scan through them real quick to make sure I don't miss anything I could learn; I just love Mexican food! Well, this is an episode that looked interesting and sounded so good I had to try it. This was just wonderful, nothing left to say. The star of the dish is the lasagna sauce. The mixture of fresh sweet corn and cream with a hint of garlic and thyme blended into this creamy wonderful sauce would go well with any vegetable lasagna you choose to throw together. I did find the sweetness of the sauce paired with the subtle heat of the poblanos nice. I used fresh white corn ears and cut the kernels off, the sauce is such an important flavor you need to make sure the corn is really good.    


Corn and Poblano Lasagna Recipe

Ingredients

4 tablespoons unsalted butter, divided
3 cloves garlic, minced, divided
2 cups fresh corn kernels (from about 2 ears), or frozen and thawed
2 cups heavy cream
1 teaspoon fresh thyme
Salt and freshly ground black pepper
1/2 cup thinly sliced white onion
1 large zucchini, thinly sliced lengthwise
4 poblano chiles, charred, peeled, stemmed, seeded and cut into 1-inch strips
12 (7 by 3-inch) no-boil lasagna sheets
2 cups shredded Oaxaca cheese, or mozzarella

Instructions

Preheat the oven to 350 degrees F.

Melt 2 tablespoons butter in a medium, heavy saucepan over medium heat. Add 2/3 of the garlic and saute for 1 minute. Mix in the corn and saute for 5 minutes. Stir in the cream and thyme. Cook over medium-low heat for 5 minutes for the flavors to incorporate. Turn off the heat and let cool slightly. Transfer to a blender and puree until smooth. Season with salt and pepper.

Heat the remaining 2 tablespoons butter in a small, heavy skillet over medium heat. Add the onions and saute until translucent, about 5 minutes. Add the remaining garlic and cook for 1 minute. Mix in the zucchini and poblano strips and cook for 5 minutes for the flavors to incorporate. Season with salt and pepper. Turn off the heat.

Spread about 1/4 of the corn mixture over the bottom of an 11 by 8-inch baking dish. Cover with a layer of 3 lasagna sheets. Spread 1/4 of the poblano mixture and 1/4 of the cheese over the pasta. Repeat the layering 3 more times. Cover with foil.

Bake until the pasta is cooked and tender, about 50 minutes. Remove the foil and turn up the oven temperature to broil. Broil until golden brown and bubbly, 8 to 10 minutes. Let stand for 15 minutes before serving.

Kim's Notes: I used 4 ears of corn. I also used regular cream instead of heavy.
Recipe courtesy Marcela Valladolid

Monday, June 27, 2011

Coffee Ice-cream

Summer is such a fun time! It is my absolute favorite season. We love making homemade ice cream, usually with seasonal fruit, but it seems nothing is ready yet or lacks flavor and I'm not waiting anymore. Impatient? Yes! This is truly the most fantastic coffee ice cream you can find anywhere. I would go head to head with Starbucks Java Chip, and let me tell you that is my ultimate favorite. I rarely buy it unless I'm having a "pick me up" attack, then I buy it and use it in milkshakes, but this could win a blind taste test. I have no doubt.
I use Medaglia D'Oro brand instant espresso coffee. It's an Italian-style espresso coffee that comes in a jar adorned with the colors of the Italian flag and begs to say "buy me! I'm imported!", but it's actually an inexpensive instant espresso that's roasted here in the States, Miami to be exact. Nonetheless, it's fantastic. I also use it to enhance chocolate deserts. If you love coffee, you can't go wrong with this. Give it a go, it couldn't be any easier. I top it with chocolate covered espresso beans from Trader Joe's....how fun is that!

Coffee Ice Cream Recipe

Ingredients

1 cup whole milk, well chilled

3/4 cup sugar
3 Tbsp instant espresso or coffee ( I use Medaglia D'oro Espresso)
2 cups heavy cream, well chilled *
1 tsp pure vanilla extract

Instructions


In a medium bowl, use a hand mixer (or a whisk) to combine the milk, sugar, and espresso powder until the sugar and espresso are dissolved, about 1-2 minutes on low speed. Stir in the heavy cream and vanilla. Cover, refrigerate, and chill if the time allows.

When mixture is chilled, turn on your ice cream maker and pour the mixture into the freezer bowl and let mix until thicken according to your maker. I use a Cuisinart and it takes about 25 minutes. The ice cream will have a soft, creamy texture. If a firmer consistency is desired, transfer the ice cream to an airtight container and place in freezer for about two hours. Remove from freezer about 10 minutes before serving.

*Kim's Notes: I like to use Half and Half in place of the heavy cream. I do not find it takes away from the creaminess and it lightens it up a touch.  Enjoy!

Pizza

My sister-in-law just built a backyard pizza oven. Pretty cool if you ask me...I asked my husband and he said "no way".  I didn't expected a "sure honey, do you want me to get started on it today?" answer anyway so I wasn't disappointed.  This put me on a mission...to bake pizza outside without the luxury and ambiance of an outdoor wood burning oven. I watched an episode of  BBQ Addiction with Bobby Flay that showed him making flatbread on the BBQ, now why didn't I think of that? I still don't understand the technical difference between flatbread and pizza, but from a culinary standpoint, my flatbread pizza was excellent! I made a traditional pizza dough, hand formed 6 oz dough balls into an oval of sorts, and baked it on the grill for a few minutes on each side. Then once the flatbread pizza's were baked enough to handle, we each made our own individual pizza's with our own choice of toppings. It only took another 5 minutes on the grill for the sauce to warm and the cheeses to melt into this wonderful homemade flatbread pizza. Mine was a beautiful pizza with a white sauce made from a basic bechamel with the addition of mascarpone and parmesan cheese. Fresh spinach, artichoke hearts, zucchini, tomatoes and a combination of mozzarella, fontina, asiago, and parmesan cheeses finished off my first masterpiece. I was very happy with the first trial. How fun is that!

Monday, June 13, 2011

Peanut Butter-Chocolate Chip-Oatmeal Cookies

I was visiting my sister-in-law and spied some freshly baked chocolate chip cookies on her stove and my jaw dropped. They were the most beautifully shaped cookie I have ever seen from a homemaker's kitchen. I thought it was the recipe, but in fact it was her technique. Ah-ha, so....I bought a new stone for cookie baking and I love it!
My cookies are baking up as beautiful as can be and now look as good as they taste. I couldn't be happier or more excited. So now I am taking all my old cookie recipes and re-making them to bake on the stone just for fun. I no longer have the spreading issue I had with baking cookies in the past. It seemed that no matter what I tried, whether I chilled the dough or even froze the dough in cute little balls, they would consistently spread and flatten. I tried measuring my flour from every measuring cup I own using both the scoop and sweep method vs. spooning my flour into my cup and sweeping. I switched to weighing flour thinking that might fix the problem since my measuring was in-consistent. I bought new baking powders and sodas thinking mine were just too old. I tried baking on every cookie sheet imaginable including a silpat to no avail. I was so discouraged with cookie baking I turned to other baking. How can somebody who manages to make some pretty fun things not be able to bake a cookie! To think my problem resolved around a baking stone and a lower temp. So far all the cookies on my new stone are baking up 25-30 minutes in a 300 degree oven using a #30 scoop. I get these plump little beauties that I can proudly call my own....not just a relief, but how fun is that!

Peanut Butter-Chocolate Chip-Oatmeal Cookie Recipe

Ingredients

1 cup (1/2 lb.) unsalted butter, at room temperature
1 cup granulated sugar
1 cup firmly packed light brown sugar
3/4 cup creamy peanut butter
2 large eggs
1 teaspoon vanilla
2 cups all-purpose flour
1/4 cup unsweetened cocoa powder
2 teaspoons baking powder
1/2 teaspoon salt
2 cups chocolate chips (12 oz.)
1 1/2 cups quick-cooking rolled oats
1 cup unsalted roasted peanuts, chopped

Instructions

1. In a bowl, with an electric mixer on medium speed, beat butter, granulated sugar, brown sugar, and peanut butter until well blended. Beat in eggs and vanilla until smooth, scraping down sides of bowl as needed.
2. In another bowl, mix flour, cocoa powder, baking powder, and salt. Stir or beat into butter mixture until well incorporated. Stir in chocolate chips, oats, and peanuts.
3. Drop dough in rounded 2-tablespoon portions, 3 inches apart, onto buttered or cooking parchment-lined 12- by 15-inch baking sheets. With a lightly floured fork, flatten slightly into 2 1/2-inch rounds about 1/2 inch thick.
4. Bake in a 350° oven until cookies are golden and tops feel set when lightly pressed, 12 to 14 minutes (they will feel underdone but will firm up as they cool); if baking more than one pan at a time, switch pan positions halfway through baking.
5. Let stand 5 minutes on sheets, then, with a wide spatula, transfer cookies to racks to cool. If hot cookies start to break, slide a thin spatula under them to release; let stand on pan to firm up, 2 to 5 minutes, then transfer to racks to cool completely.

Marlene Sorosky Gray, Sunset NOVEMBER 2003

Monday, June 6, 2011

Lulu's Cupcakes - The Hostess Look-a-like

Remember eating the hostess cupcakes as a kid? The smell of the chocolate hitting your nose as you open the package and the anticipation of that first bite of heaven. The sweet marshmallow creme with the light fluffy cake. Did you ever peel off the top ganache and save that for last? Well this is over the top, and no preservatives! I have made these for several occasions and they are always a hit, it's been a while and I had a huge craving....so my excuse?  Graduation party for my nephews!

I think it was the very first issue of the Food Network Magazine that came out years ago with an article on Lulu's Bake Shoppe in Boston who made the most adorable cupcakes including the look-a-like Hostess Cupcakes. I think she was at the forefront of the cupcake craze. How can you look at the pictures in that article and not give it a go? I used my own devil's food cupcake recipe, as there is no other in my opinion, but otherwise followed explicit instructions.  The biggest kick I got out of the whole process was learning that they actually made a piping tip to get that stuff in the middle! How fun is that?


Lulu's Cupcake Recipe

Ingredients

For the Cupcakes: (*Note, I did not use the cupcake recipe, I used my go to found here)

1 1/4 cups all-purpose flour
2 teaspoons baking soda
2 teaspoons baking powder
1/4 teaspoon salt
1 1/4 cups granulated sugar
4 ounces unsweetened chocolate, chopped
1 stick unsalted butter, cut into pieces
2 teaspoons vanilla extract
2 large eggs, lightly beaten

For the Filling:

4 tablespoons unsalted butter, at room temperature
1 cup confectioners' sugar
2 teaspoons vanilla extract
3 tablespoons heavy cream
1 cup marshmallow creme

For the Ganache and Icing:

6 ounces bittersweet chocolate, chopped
1/2 cup heavy cream
1 stick plus 1 tablespoon unsalted butter
2 1/4 teaspoons vanilla extract
1 tablespoon milk
2 cups confectioners' sugar

Instructions

Position a rack in the center of the oven and preheat to 350 degrees. Place paper liners in two 12-cup muffin pans.

Prepare the cupcakes:

Sift together the flour, baking soda, baking powder and salt in a bowl. Bring the sugar and 1 cup water to a boil in a saucepan, stirring until the sugar dissolves, about 3 minutes. Pour into a large bowl; add the chocolate and butter and let sit, stirring occasionally, until the chocolate is melted and the mixture has cooled slightly. Stir in the vanilla. Using a mixer, beat in the eggs, then mix in the dry ingredients.
Divide the batter evenly between the prepared pans (about 1/4 cup batter per cupcake) and bake until a toothpick inserted in the center comes out clean, about 25 minutes. Cool in the pans for about 25 minutes, then transfer cupcakes to a rack to cool completely.

Meanwhile, prepare the filling:

Using a mixer, cream the butter until light and fluffy. Beat in 1/2 cup confectioners' sugar. Add the vanilla and 1 tablespoon heavy cream; beat until smooth. Beat in the remaining 1/2 cup confectioners' sugar and 2 tablespoons heavy cream in batches, alternating after each addition. Beat in the marshmallow creme; set aside.

Prepare the ganache:

Place the chocolate in a stainless-steel bowl. Heat the cream and 1 tablespoon butter until just boiling, then pour over the chocolate; let stand for 5 minutes. Whisk until smooth. Add 2 teaspoons vanilla; let stand until cool but still glossy and liquid.
Spoon the filling into a pastry bag with a medium tip. Insert the tip into the center of each cupcake top; fill until the cupcake is heavier (do not overfill). Dip the cupcake tops in the ganache. Chill for at least 15 minutes.
Meanwhile, prepare the icing: Using a mixer, beat the remaining 1 stick butter, 1/4 teaspoon vanilla, the milk and confectioners' sugar until smooth. Spoon into a pastry bag with a small tip; pipe onto the cupcakes to decorate.

Recipe from Lulu's Bake Shoppe courtesy of FoodNetwork Magazine

Tuesday, May 31, 2011

Pina Colada Sorbet

What do you make while you have unseasonably cold weather; force your husband to start a fire after all the firewood has been put away for the summer and the fireplace cleaned out, Sorbet!

 While clicking through the Cooking Light website I stumbled upon this recipe from the June 2011 issue.

Lately the pineapple has had exceptional flavor and there is no sense in letting that go to waste. This sorbet is wonderfully creamy and I think could be construed as a sherbet due to the coconut milk and cream of coconut. I suppose if you wanted it even richer, you could use full fat coconut milk, but I did stick with the light coconut milk as the recipe suggested. I generally like to make a recipe as stated before I try and mess with it. Sometimes you find a recipe just doesn't have what it takes to spend the time to improve on, well this one does. How fun is that!

Pina Colada Sorbet Recipe

Ingredients

3 cups cubed fresh pineapple
1 cup coconut water
1/2 cup sugar
1 cup light coconut milk
2/3 cup cream of coconut

Instructions

1. Place first 3 ingredients in a blender, and process until smooth and sugar dissolves. Combine pureed pineapple mixture, coconut milk, and cream of coconut in a bowl; stir with a whisk. Cover and refrigerate until thoroughly chilled.
2. Pour mixture into the freezer can of an ice-cream freezer, and freeze according to the manufacturer's instructions. Spoon sorbet into a freezer-safe container; cover and freeze for 2 hours or until firm.

David Bonom, Cooking Light
JUNE 2011
Pina Colada Sorbet